Aloe plants are often considered nearly impossible to kill, but even Care for an Aloe Plant hardy succulent can struggle when its basic needs are overlooked. The most common mistake is treating aloe like an ordinary houseplant and watering it too often.
Aloe vera stores water in its thick, fleshy leaves, so it prefers plenty of light, fast-draining soil, and time to dry between waterings. Too much moisture can cause yellow or soft leaves and root rot, while low light can leave the plant weak and stretched.
The good news is that care for an aloe plant is simple once you understand how it stores water. Give it the right light, excellent drainage, and careful watering, and it can stay healthy and attractive for years.
Quick Answer
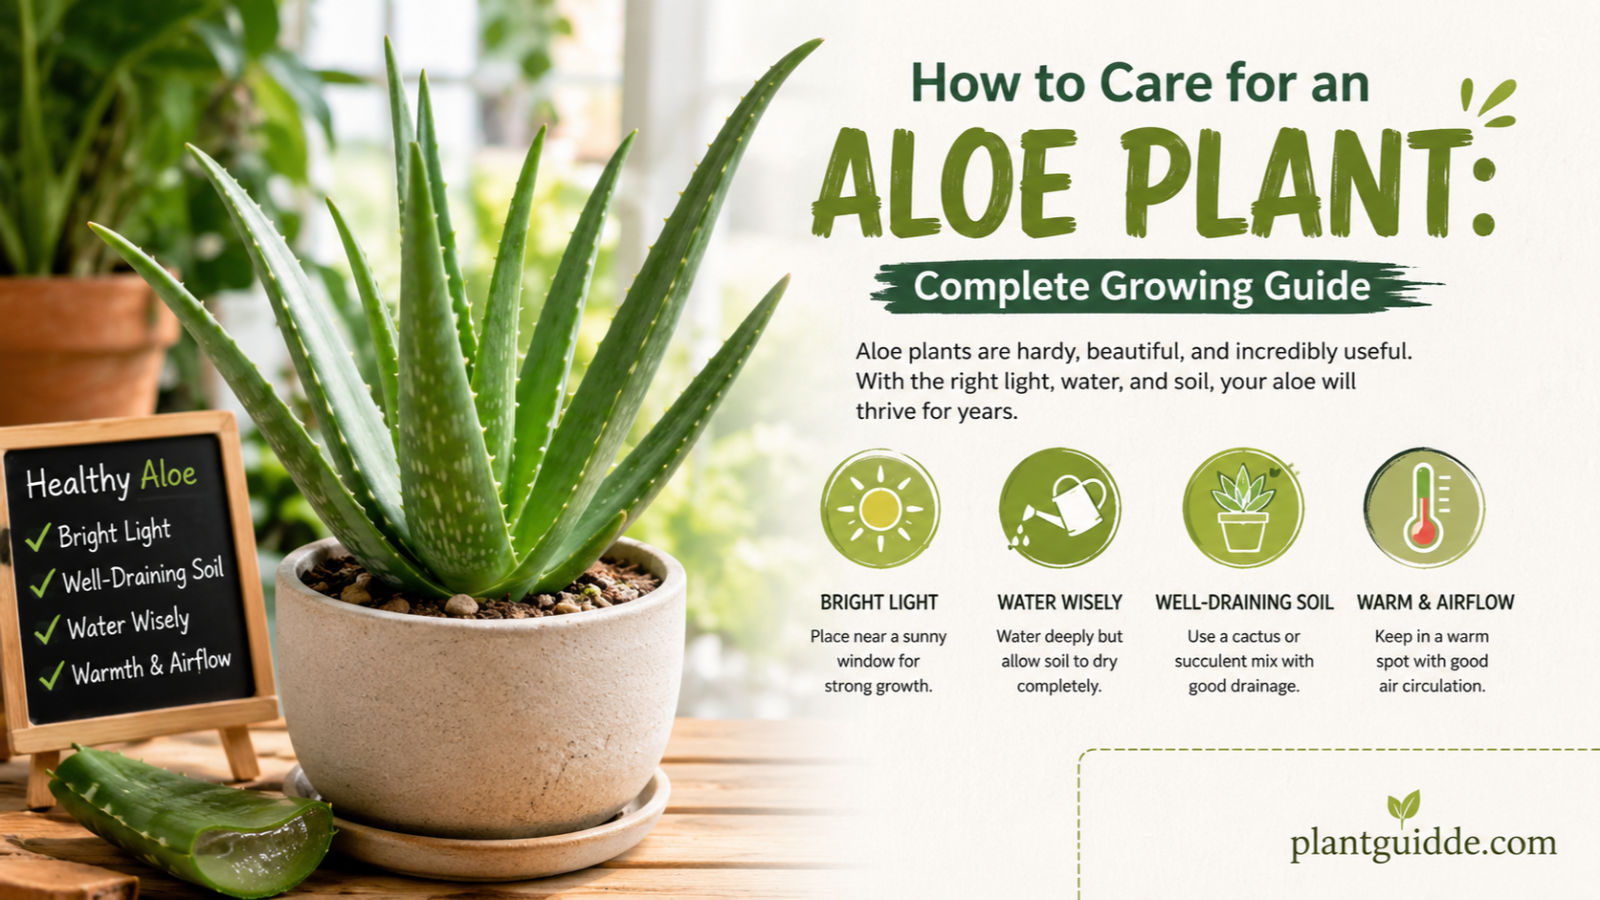
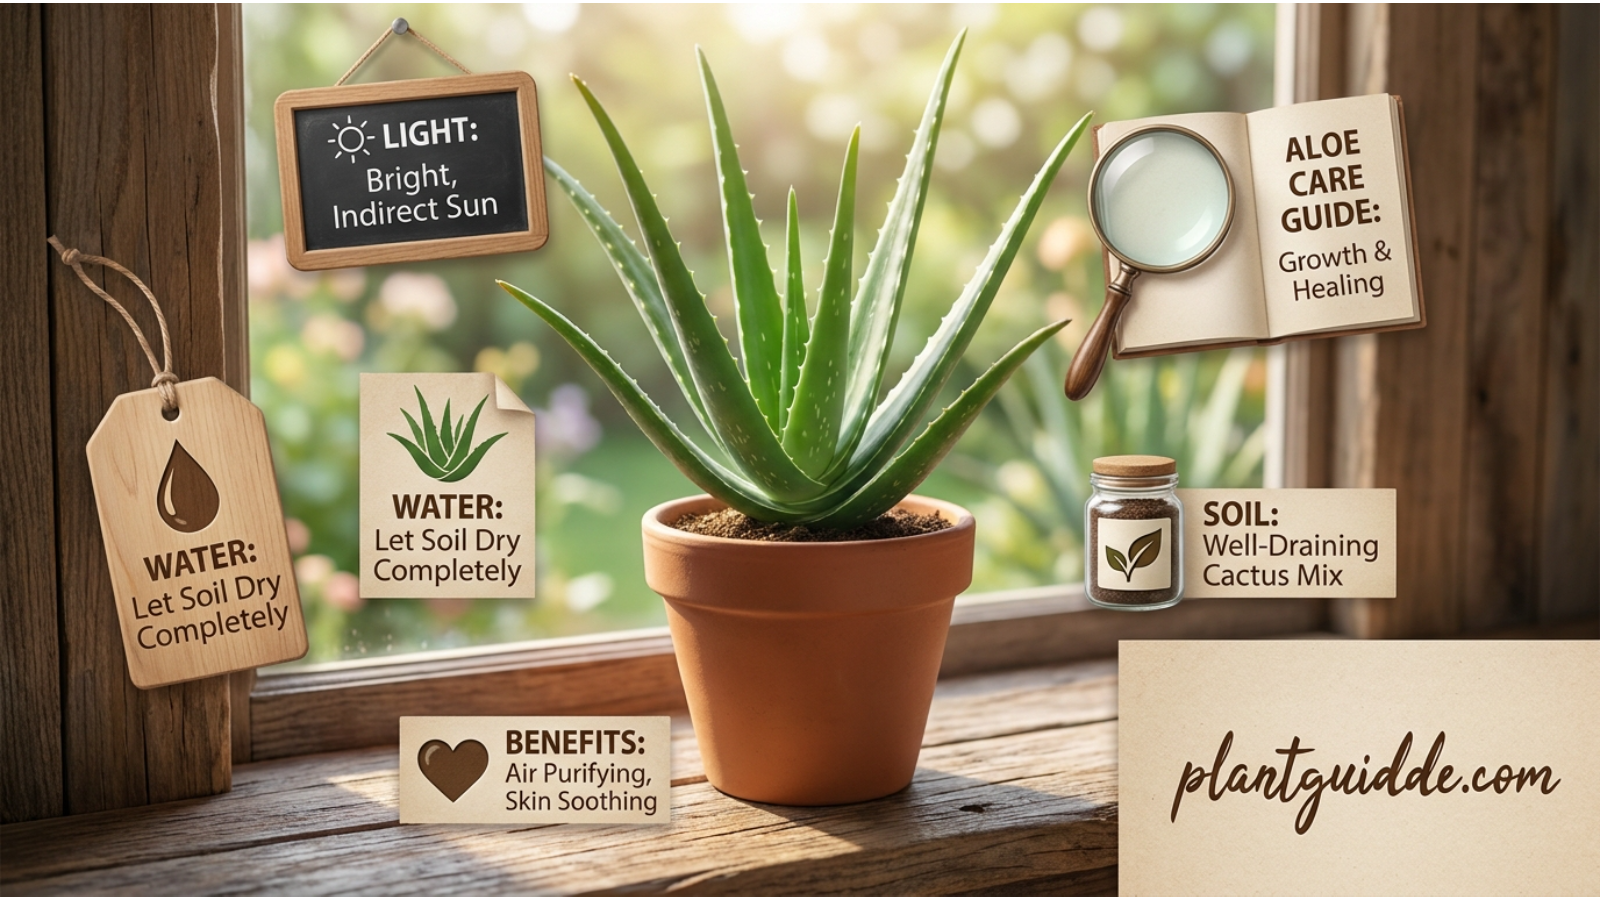
To care for an aloe plant, place it in bright light, use a fast-draining soil mix, and water only when the soil has dried thoroughly. Aloe vera is a drought-tolerant succulent, so consistently wet soil is more dangerous than occasional dryness. Use a pot with drainage holes, avoid letting water collect around the roots, and provide warm temperatures with good airflow. Adjust watering according to light, temperature, and season rather than following a fixed schedule.
Understanding Your Aloe Plant
The plant commonly grown indoors as aloe is Aloe vera, a succulent species valued for its fleshy leaves and ability to tolerate dry conditions.
Its thick leaves are an important clue to how it should be grown. Instead of relying on frequent watering from the surrounding soil, aloe stores moisture within its tissues.
This adaptation makes aloe different from plants that naturally grow in consistently moist forest environments.
What this means for indoor care
A healthy aloe generally prefers:
- Bright light
- Well-draining soil
- A container with drainage holes
- Thorough but infrequent watering
- Warm, stable temperatures
- Good airflow
- A period of drying between waterings
The most important principle is avoid keeping the roots continuously wet.
Aloe Plant Care at a Glance
| Care requirement | What aloe prefers | What to avoid |
|---|---|---|
| Light | Bright light, including several hours of direct sun when acclimated | Very dark corners |
| Water | Thorough watering after the soil dries | Frequent small amounts |
| Soil | Gritty, fast-draining succulent or cactus mix | Heavy, moisture-retentive soil |
| Pot | Drainage holes | Sealed containers |
| Humidity | Normal indoor humidity is usually sufficient | Constantly damp conditions |
| Temperature | Warm indoor conditions | Cold drafts and freezing temperatures |
| Fertilizer | Light feeding during active growth | Frequent heavy fertilization |
| Repotting | When crowded or soil has deteriorated | Oversized pots |
| Airflow | Good circulation | Permanently stagnant, wet conditions |
How to Care for an Aloe Plant Step by Step
1. Give Aloe Plenty of Bright Light
Light is one of the most important factors in successful aloe care.
Place the plant near a bright window where it receives substantial natural light. A south- or west-facing window can work well in many homes, although the intensity of sunlight varies by climate, window glass, season, and indoor placement.
Aloe can tolerate direct sunlight, but a plant that has been growing in a dim room should not suddenly be moved into several hours of intense sun.
Why light matters
Aloe needs adequate light to maintain compact growth and strong leaves. Insufficient light can cause the plant to stretch toward the window, producing elongated growth rather than the compact rosette most growers want.
Practical tip
Care for an Aloe Plant your aloe has been indoors in relatively low light, increase sun exposure gradually. Watch the leaves during the transition.
Signs that the plant may need more light include:
- Long, stretched growth
- A leaning rosette
- Pale or unusually green foliage
- Slow growth
- Leaves spreading widely instead of remaining relatively compact
Signs of excessive sudden sun exposure can include bleached, reddish, tan, or brown patches on the leaves.
Image Suggestion: A comparison showing a compact, well-lit aloe beside a stretched aloe growing in insufficient light.
Water Aloe Deeply—but Not Frequently
Watering is where most aloe-care problems begin.
Instead of giving aloe a small splash every few days, wait until the soil has dried substantially. When it is time to water, soak the soil thoroughly until water drains from the bottom of the container.
Then allow the excess water to drain away completely.
Why this method works
Aloe is adapted to periods of limited rainfall. Its leaves can hold moisture, so the plant does not need constantly wet soil.
Frequent watering creates a different problem: the roots remain surrounded by moisture and have less opportunity to dry and receive adequate oxygen. Over time, this can contribute to root deterioration.
How often should you water aloe?
There is no reliable universal schedule.
Your watering frequency depends on:
- Amount of sunlight
- Pot size
- Soil composition
- Container material
- Indoor temperature
- Season
- Air circulation
- Plant size
An aloe in bright light and a small terracotta pot may dry much faster than an aloe in a large plastic container in a dim room.
A better watering test
Before watering, check the soil rather than the calendar.
Push a finger several inches into the soil or use another reliable method to assess moisture deeper in the pot. If the soil is still noticeably damp, give it more time.
When the soil has dried sufficiently, water thoroughly.
Avoid the “tiny sip” method
A small amount of water may moisten only the upper layer of soil while leaving deeper roots in an inconsistent moisture environment.
For aloe, it is generally better to:
Dry → Water thoroughly → Drain → Dry again.
Use Fast-Draining Aloe Plant Soil
Aloe does best in soil that allows excess water to move away from the roots quickly.
A commercial cactus or succulent potting mix is usually a convenient starting point. Some mixes can still hold more moisture than ideal, particularly in containers without good drainage, so the exact performance of the soil matters more than the label.
A suitable mix should:
- Drain quickly
- Provide some air around the roots
- Resist becoming compacted
- Dry within a reasonable period between waterings
Why ordinary potting soil can be problematic
Standard indoor potting mixes are often designed to retain moisture. That can be useful for tropical foliage plants but less suitable for drought-adapted succulents when the mix stays wet for too long.
Care for an Aloe Plant your aloe’s soil remains wet for many days after watering, look at the entire growing setup rather than simply reducing the amount of water.
The problem could be:
- Dense soil
- An oversized pot
- Poor drainage
- Insufficient light
- Cool conditions
- A container that holds excessive moisture
Choose the Right Pot
Aloe does not need an enormous container.
Choose a pot that is appropriate for the root system and has at least one functional drainage hole.
Terracotta vs. plastic
Terracotta can be useful because the porous material allows moisture to escape through the sides of the pot.
Plastic retains moisture longer, which is not automatically bad, but watering needs to be adjusted accordingly.
Neither material guarantees healthy growth. Drainage, soil, light, and watering habits all work together.
Avoid oversized pots
A large pot contains a greater volume of soil. Care for an Aloe Plant the aloe has a relatively small root system, that soil can remain wet for a long time after watering.
A slightly snug pot is often easier to manage than a dramatically oversized one.
Keep Aloe in a Warm, Stable Environment
Aloe generally performs well under normal warm indoor conditions.
Protect it from:
- Freezing temperatures
- Very cold windows
- Cold drafts
- Sudden environmental changes
If an aloe is placed close to a cold window during winter, the combination of low temperature and wet soil can be particularly stressful.
A stable indoor location with good light is usually preferable.
Humidity Usually Isn’t a Major Concern
Unlike many tropical houseplants, aloe does not require high humidity to remain healthy.
Normal indoor humidity is generally adequate.
This is another reason not to treat aloe like plants that need frequent misting. Misting the leaves does not solve poor soil drainage, inadequate light, or improper watering.
If your home is humid, focus even more on allowing the soil to dry appropriately and maintaining good airflow around the plant.
Fertilize Aloe Sparingly
Aloe is not a heavy feeder.
During active growth, you can use a diluted fertilizer formulated for succulents or houseplants, following the product’s instructions.
The important point is moderation.
Excessive fertilizer can contribute to salt accumulation in the soil and may damage roots or produce weak, unnatural growth.
A simple approach
Care for an Aloe Plant your aloe is growing steadily in fresh, nutrient-containing soil, there may be little reason to fertilize frequently.
Think of fertilizer as a supplement—not a substitute for good light, appropriate soil, and proper watering.
How to Tell What Your Aloe Is Trying to Tell You
Aloe leaves often provide useful clues about the plant’s growing conditions.
Instead of reacting to one symptom immediately, look at several factors together.
Why Are My Aloe Leaves Turning Yellow?
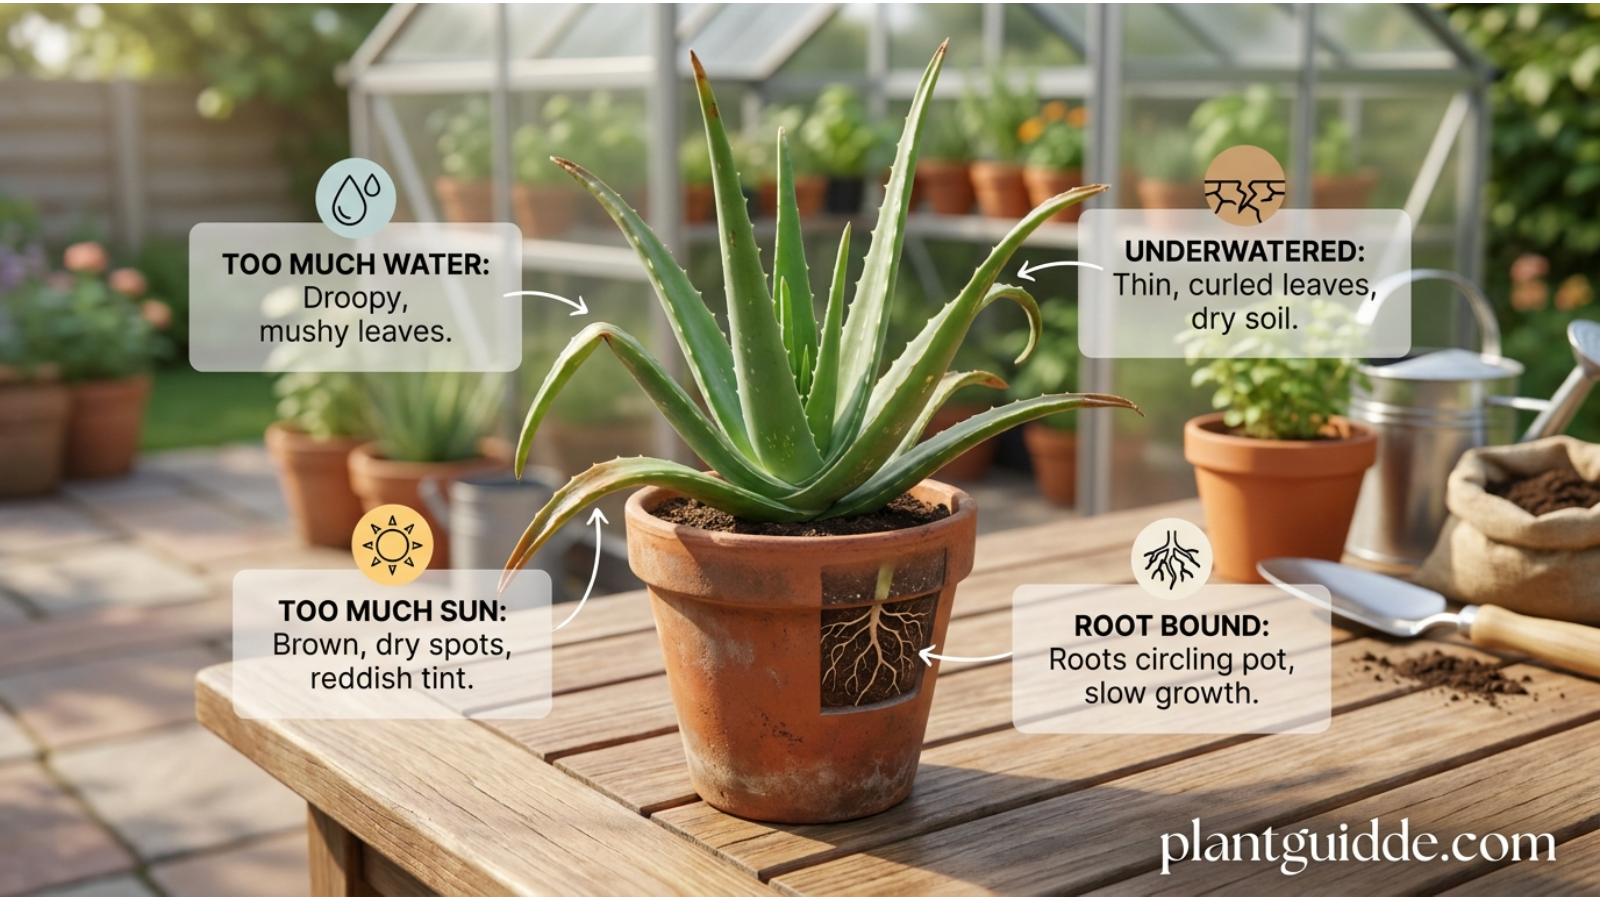
Yellow leaves can have several causes, but excessive moisture is one of the first things worth investigating.
Check:
- How often you water.
- Whether the soil is still wet when you water again.
- Whether the pot has drainage holes.
- Whether the soil is compacted.
- Whether the plant is receiving enough light.
If multiple leaves are becoming yellow while the soil stays wet, the watering and drainage setup deserves attention.
An occasional older leaf turning yellow is not necessarily a crisis. Plants naturally replace older foliage.
Why Are Aloe Leaves Turning Brown?
Brown areas may result from different stresses.
Possible causes include:
- Sunburn after sudden exposure to intense sunlight
- Physical damage
- Severe dehydration
- Root problems
- Environmental stress
Look at the location and texture of the damaged area.
A dry, tan patch after moving a plant from low light to strong afternoon sun suggests a different problem from widespread soft, discolored leaves in persistently wet soil.
Expert tip: Don’t diagnose aloe problems from leaf color alone. Always check the roots, soil moisture, recent light changes, and watering history.
Why Is My Aloe Plant Drooping?
Drooping can be caused by either too little or too much water.
That sounds contradictory, but it is an important distinction.
A severely dehydrated plant may have leaves that lose firmness. However, an aloe suffering from root damage can also droop because damaged roots cannot effectively support normal water uptake.
Check the soil before watering.
If the soil is bone dry and the leaves are thin or limp, dehydration may be involved.
If the soil is consistently wet and the leaves are soft or deteriorating, overwatering and root problems become more concerning.
Why Are My Aloe Leaves Soft or Mushy?
Soft, mushy leaves are a warning sign.
Healthy aloe leaves should generally feel firm and substantial.
If the plant has become soft while the soil remains wet, inspect the root zone. Persistent moisture can damage roots, and advanced rot may spread into the plant’s base.
What to do
Remove the plant from its container and inspect the roots if root rot is suspected.
Healthy roots should not have the appearance and smell associated with decaying tissue.
If damaged roots are present, remove affected material with clean tools and reassess the soil, pot, drainage, and watering routine before replanting.
Do not simply add more water because the leaves look wilted.
Aloe Leaves Curling: What Does It Mean?
Curling leaves can indicate environmental stress, but the cause isn’t always obvious.
Possible factors include:
- Severe dryness
- Root damage
- Excessive heat
- Sudden environmental changes
- Poor growing conditions
Start with the soil.
If the soil has been dry for an extended period, dehydration may be contributing to curling.
If the soil is wet, watering again is unlikely to solve the problem. Investigate drainage and root health instead.
This is one of the most useful aloe-care principles:
A wilted or curled leaf does not automatically mean the plant needs more water.
How to Repot an Aloe Plant
Aloe usually does not need frequent repotting.
Repot when:
- Roots are becoming crowded
- The plant has become unstable
- The pot no longer drains properly
- The soil has broken down or become compacted
- The plant has clearly outgrown its container
Step-by-step repotting
- Choose a pot only modestly larger than the current container.
- Make sure it has drainage holes.
- Prepare a fast-draining succulent or cactus mix.
- Carefully remove the aloe from its old pot.
- Inspect the roots for damage or decay.
- Remove unhealthy material with clean tools if necessary.
- Place the plant at approximately the same depth as before.
- Fill around the roots with fresh soil.
- Avoid burying the base of the plant unnecessarily.
- Allow the plant to settle into its new environment.
Don’t bury the aloe’s base
Keeping the crown or central growing point buried in wet soil can create unnecessary moisture problems.
Position the plant so the base remains appropriately above the soil surface.
Image Suggestion: Step-by-step aloe repotting diagram showing the correct planting depth, drainage hole, soil mix, and root inspection.
How to Care for Aloe Plant Pups
Mature aloe plants can produce offsets, commonly called pups, around the base.
These small plants can eventually be separated and grown independently.
When should you separate an aloe pup?
A pup is easier to handle once it has developed a reasonable size and, ideally, its own roots.
To separate one:
- Remove the plant carefully from its container.
- Identify where the pup connects to the parent plant.
- Separate it carefully using clean tools if necessary.
- Allow damaged cut surfaces to dry appropriately.
- Plant the pup in a small container with fast-draining soil.
- Avoid excessive watering while it establishes.
Don’t place a tiny pup in a huge pot. A smaller container makes moisture management easier.
Seasonal Aloe Plant Care
Aloe Care in Spring and Summer
During brighter, warmer months, aloe may enter a period of stronger growth.
It may need watering somewhat more frequently than during winter, but the soil should still be allowed to dry appropriately between waterings.
This is also a good time to:
- Repot if necessary
- Remove damaged leaves
- Monitor for pests
- Provide stronger light gradually
- Apply modest fertilizer if appropriate
Aloe Care in Fall and Winter
Growth may slow considerably when light levels and temperatures decrease.
Because the plant may use water more slowly, the soil can stay wet longer.
This means winter is not simply a time to continue the same watering schedule.
Instead, check the soil and plant conditions each time.
A fixed weekly schedule is less reliable than observing the plant and its growing environment.
Common Aloe Care Mistakes to Avoid
1. Watering on a Calendar
“Water every Sunday” sounds convenient, but indoor conditions change.
Aloe should be watered according to soil moisture and environmental conditions rather than an arbitrary schedule.
2. Keeping Aloe in a Dark Room
Aloe can survive for some time in poor light, but survival is not the same as healthy growth.
Insufficient light often leads to weak, stretched growth.
3. Using a Pot Without Drainage
Even excellent soil cannot compensate for a container that traps excess water.
4. Using Heavy Soil
Soil that remains wet for extended periods increases the risk of root problems.
5. Moving Aloe Into Strong Sun Too Quickly
A plant accustomed to low indoor light may scorch when suddenly exposed to intense direct sunlight.
Acclimate it gradually.
6. Watering Because the Leaves Look Droopy
Drooping is a symptom, not a diagnosis.
Check the soil and roots before adding water.
7. Choosing a Huge Pot
More soil does not necessarily mean more room to grow. For aloe, excess soil can mean excess moisture.
A Simple Aloe Care Routine for Beginners
If you want a straightforward routine, use this checklist.
Every few days
Look at the plant rather than automatically watering it.
Check for:
- Major leaf discoloration
- Pest activity
- Physical damage
- Unusual softness
- Changes in growth
Before watering
Check the soil moisture.
If it is still damp, wait.
When watering
Water thoroughly and allow excess water to escape from the drainage hole.
Never leave the container sitting in standing water.
Every few weeks
Check whether the plant is receiving enough light and whether the soil is drying at a reasonable rate.
Seasonally
Reassess watering frequency because light, temperature, and growth rate change throughout the year.
Quick Aloe Problem-Solving Guide
| Symptom | First thing to check | Possible cause |
|---|---|---|
| Yellow leaves | Soil moisture | Excess moisture, aging leaves, stress |
| Soft leaves | Roots and soil | Overwatering/root damage |
| Thin, limp leaves | Soil moisture | Dehydration or root dysfunction |
| Brown sunken patches | Recent light exposure | Sun stress or damage |
| Stretched growth | Light level | Insufficient light |
| Curling leaves | Soil + roots | Dryness or root stress |
| Slow growth | Light, season, roots | Low light or unfavorable conditions |
| Wet soil for many days | Pot and soil | Poor drainage or oversized container |
How to Make an Aloe Plant Grow Better
If your aloe is alive but looks weak, don’t immediately reach for fertilizer.
Work through the growing conditions in this order:
1. Improve the light
Make sure the plant receives enough bright light for compact growth.
2. Examine the soil
If the soil is dense and remains wet, replace it with a better-draining mix when appropriate.
3. Check the pot
Confirm that water can escape freely through drainage holes.
4. Adjust watering
Allow the soil to dry between thorough waterings.
5. Inspect the roots if symptoms persist
If the plant remains soft or deteriorates despite corrected watering, investigate the root system.
This sequence is useful because it addresses the environmental factors most likely to affect aloe health before adding unnecessary treatments.
Can Aloe Plants Grow Indoors?
Yes. Aloe vera can grow successfully indoors when it receives sufficient light.
The biggest indoor challenge is usually not temperature—it is light.
Aloe placed several feet away from a bright window may receive dramatically less usable light than one positioned close to the glass.
If natural light is limited, supplemental grow lighting can be considered.
Indoor aloe also benefits from being kept away from persistently damp areas where poor airflow and slow soil drying can create problems.
Can You Put Aloe Outside?
Aloe can grow outdoors in suitable warm climates and can benefit from abundant natural light.
However, outdoor conditions are often much more intense than indoor conditions.
When moving an indoor aloe outside:
- Introduce stronger sunlight gradually.
- Protect it from extreme heat initially.
- Avoid leaving it exposed to freezing temperatures.
- Make sure rainwater can drain freely.
- Monitor the soil because outdoor weather can dramatically change watering needs.
A plant that handles bright indoor light may still scorch if immediately placed in intense midday sun.
Aloe Plant Pests to Watch For
A healthy aloe is not immune to pests.
Inspect the plant periodically for:
- Mealybugs
- Scale insects
- Aphids
- Spider mites
Pay particular attention to areas where leaves meet the stem or where debris can accumulate.
Early detection is much easier to manage than a large infestation.
If you notice pests, isolate the affected plant from other houseplants and identify the pest before selecting a treatment.
When Should You Cut Aloe Leaves?
Remove leaves when they are:
- Completely dead
- Severely damaged
- Rotten
- Creating a clear hygiene or structural problem
Use a clean, sharp tool and make the cut carefully.
Avoid removing healthy leaves simply because they are older or slightly imperfect. Aloe grows from its central growing point, so excessive pruning can reduce the plant’s ability to produce new foliage.
Can You Use Aloe Vera Gel From a Houseplant?
Aloe vera is widely known for the gel inside its leaves, but growing an aloe plant for decorative purposes is different from preparing aloe for consumption or topical use.
The leaf contains compounds other than the inner gel, including yellow latex near the outer portion of the leaf. Home preparation therefore requires appropriate identification and careful processing.
For medicinal or dietary use, don’t assume that gel taken directly from an ornamental plant is automatically safe or appropriate.
For ordinary houseplant care, the priority should be keeping the plant healthy rather than harvesting its leaves.
Expert Tips That Make Aloe Care Easier
Don’t judge watering by the top inch of soil alone
The surface can dry quickly while deeper soil remains wet. Check deeper into the container before watering.
Use the pot as part of your watering strategy
A terracotta container, fast-draining mix, and bright light can produce a very different drying rate from a large plastic pot filled with moisture-retentive soil.
Look at the whole plant
One damaged leaf is less informative than a pattern of symptoms across multiple leaves.
Change one major variable at a time
If you simultaneously move an aloe into full sun, repot it, fertilize it, and change its watering schedule, you won’t know which change helped or caused additional stress.
Don’t confuse drought tolerance with drought dependence
Aloe can tolerate dry conditions, but that doesn’t mean it should be deliberately neglected. The goal is controlled drying, not chronic dehydration.
FAQs:
How often should you water an aloe plant?
Water when the soil has dried substantially rather than following a fixed schedule. Then water thoroughly and let excess water drain completely. Light, temperature, pot size, and soil determine how quickly the plant dries.
Does aloe need direct sunlight?
Aloe benefits from bright light and can tolerate direct sunlight when properly acclimated. If a plant has been growing in low light, introduce stronger sun gradually to reduce the risk of leaf scorch.
Why is my aloe plant turning yellow?
Yellow leaves can result from excessive moisture, root stress, aging foliage, or other environmental problems. If the soil stays wet for long periods, investigate drainage and watering first.
Why are my aloe leaves soft?
Soft leaves can indicate dehydration, but they can also occur when roots have been damaged by excessive moisture. Check the soil before deciding to water.
What is the best soil for aloe plants?
Use a fast-draining cactus or succulent mix. The ideal soil should allow excess water to escape while maintaining enough structure for healthy roots.
Do aloe plants need humidity?
Usually not. Aloe is a succulent and generally adapts well to ordinary indoor humidity. Good drainage is more important than creating a highly humid environment.
Can aloe grow in low light?
It may survive in low light, but prolonged insufficient light often produces weak, stretched growth. Bright light is preferable for maintaining a compact, healthy plant.
Should I mist my aloe plant?
Misting is generally unnecessary. Aloe’s water needs are better managed through appropriate soil moisture, thorough watering, drainage, and drying periods.
Should aloe soil dry completely before watering?
The soil should be allowed to dry substantially between waterings, but the exact point depends on the plant’s environment. The goal is to prevent continuously wet soil while avoiding prolonged severe dehydration.
How do I know if my aloe has root rot?
Look for a combination of persistently wet soil, soft or deteriorating leaves, poor growth, and unhealthy roots. If these symptoms occur together, remove the plant from its container and inspect the root system.
Does aloe need fertilizer?
Aloe generally has modest fertilizer needs. If you fertilize, use a diluted product appropriate for succulents and avoid frequent heavy applications.
When should I repot my aloe plant?
Repot when the plant has become significantly root-bound, the container no longer works well, the soil has deteriorated, or drainage has become problematic. Avoid moving aloe into an unnecessarily large pot.
Final Takeaway
Successful care for an aloe plant is less about doing more and more about avoiding the conditions aloe dislikes.
Give it bright light, fast-draining soil, a pot with drainage, thorough but infrequent watering, and enough time for the soil to dry between waterings. When something goes wrong, don’t automatically add water. Check the soil, roots, light, pot, and recent environmental changes first.
The most useful habit is to stop treating aloe like a plant that needs constant attention. Observe it, understand how quickly its soil dries, and adjust your routine to the conditions in your home. Once that balance is established, aloe can remain healthy and attractive with surprisingly little maintenance.

Asad Mumtaz is a dedicated plant enthusiast and gardening writer with a passion for helping people care for their plants successfully. He specializes in plant care guides, indoor gardening, and practical growing tips for all skill levels. His content focuses on making gardening simple, enjoyable, and rewarding. Through his work, Asad shares reliable advice to help readers create thriving green spaces.